DIY Air Dry Modeling Material: CAC Tried Recipes with Commentary
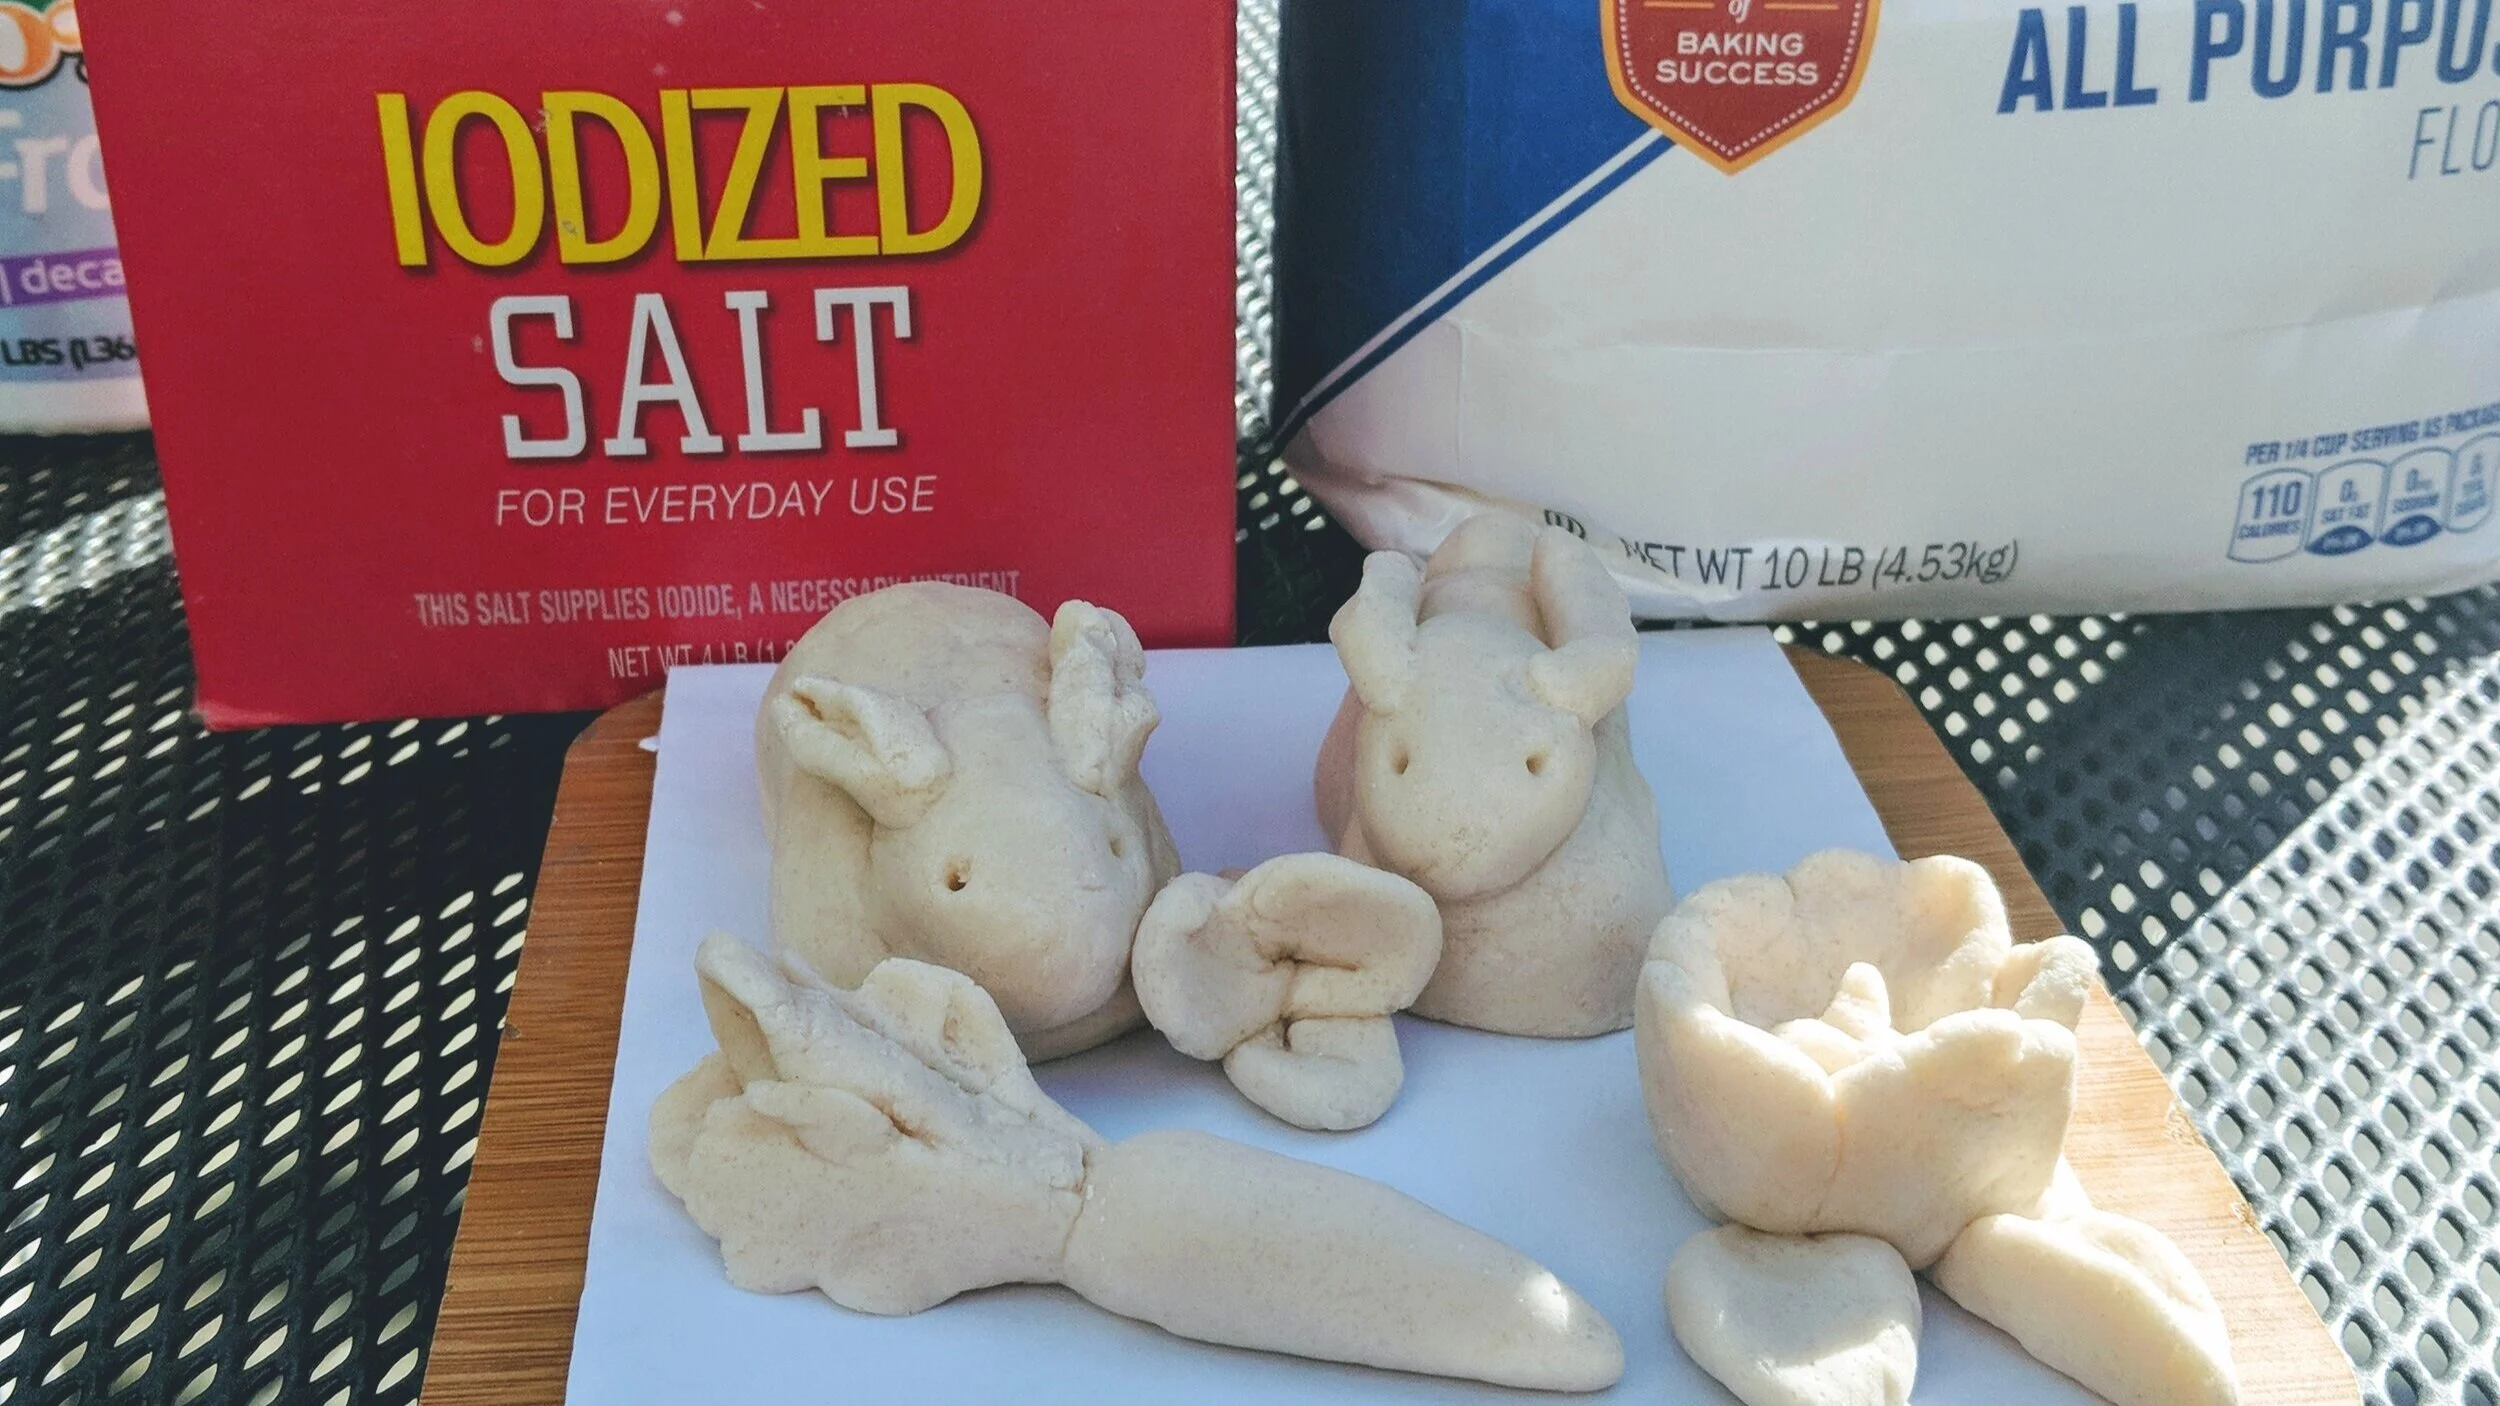
Bunnies and plants made from the flour-salt recipe
In these times, when online shipping can take a while and you want to have a hands-on craft project to keep the kids (or yourself!) busy, it helps to have a few backup recipes for making your own clay. Mind, coming from a ceramics center, this “clay” isn’t clay as ceramicists know it, but is good enough for modeling and if you don’t have clay at home and need something quick and easy. Instead of coloring with glaze, these at-home clays can be painted on with acrylics or dyed beforehand with food-coloring.
Below, I tried two recipes I found on the internet, the first of which is a cornstarch-glue based air dry clay. The second recipe is a flour-salt-water recipe that can either be air-dried or baked. Enjoy!
Cornstarch-Glue Recipe
Have non-toxic, washable glue (any PVA-based glue or Elmer’s white)? Cornstarch? Oil? A microwave? Then this easy recipe is for you. If you have children prone to putting everything in their mouths, I would recommend the second flour-based recipe. Watch the video link for a very helpful, clear DIY video. Below are my pictures and what my experience was – roll up your sleeves and have fun!
The first recipe is from Youtube channel WhatsUpMoms, “DIY Air Dry Clay (Easy recipe)”
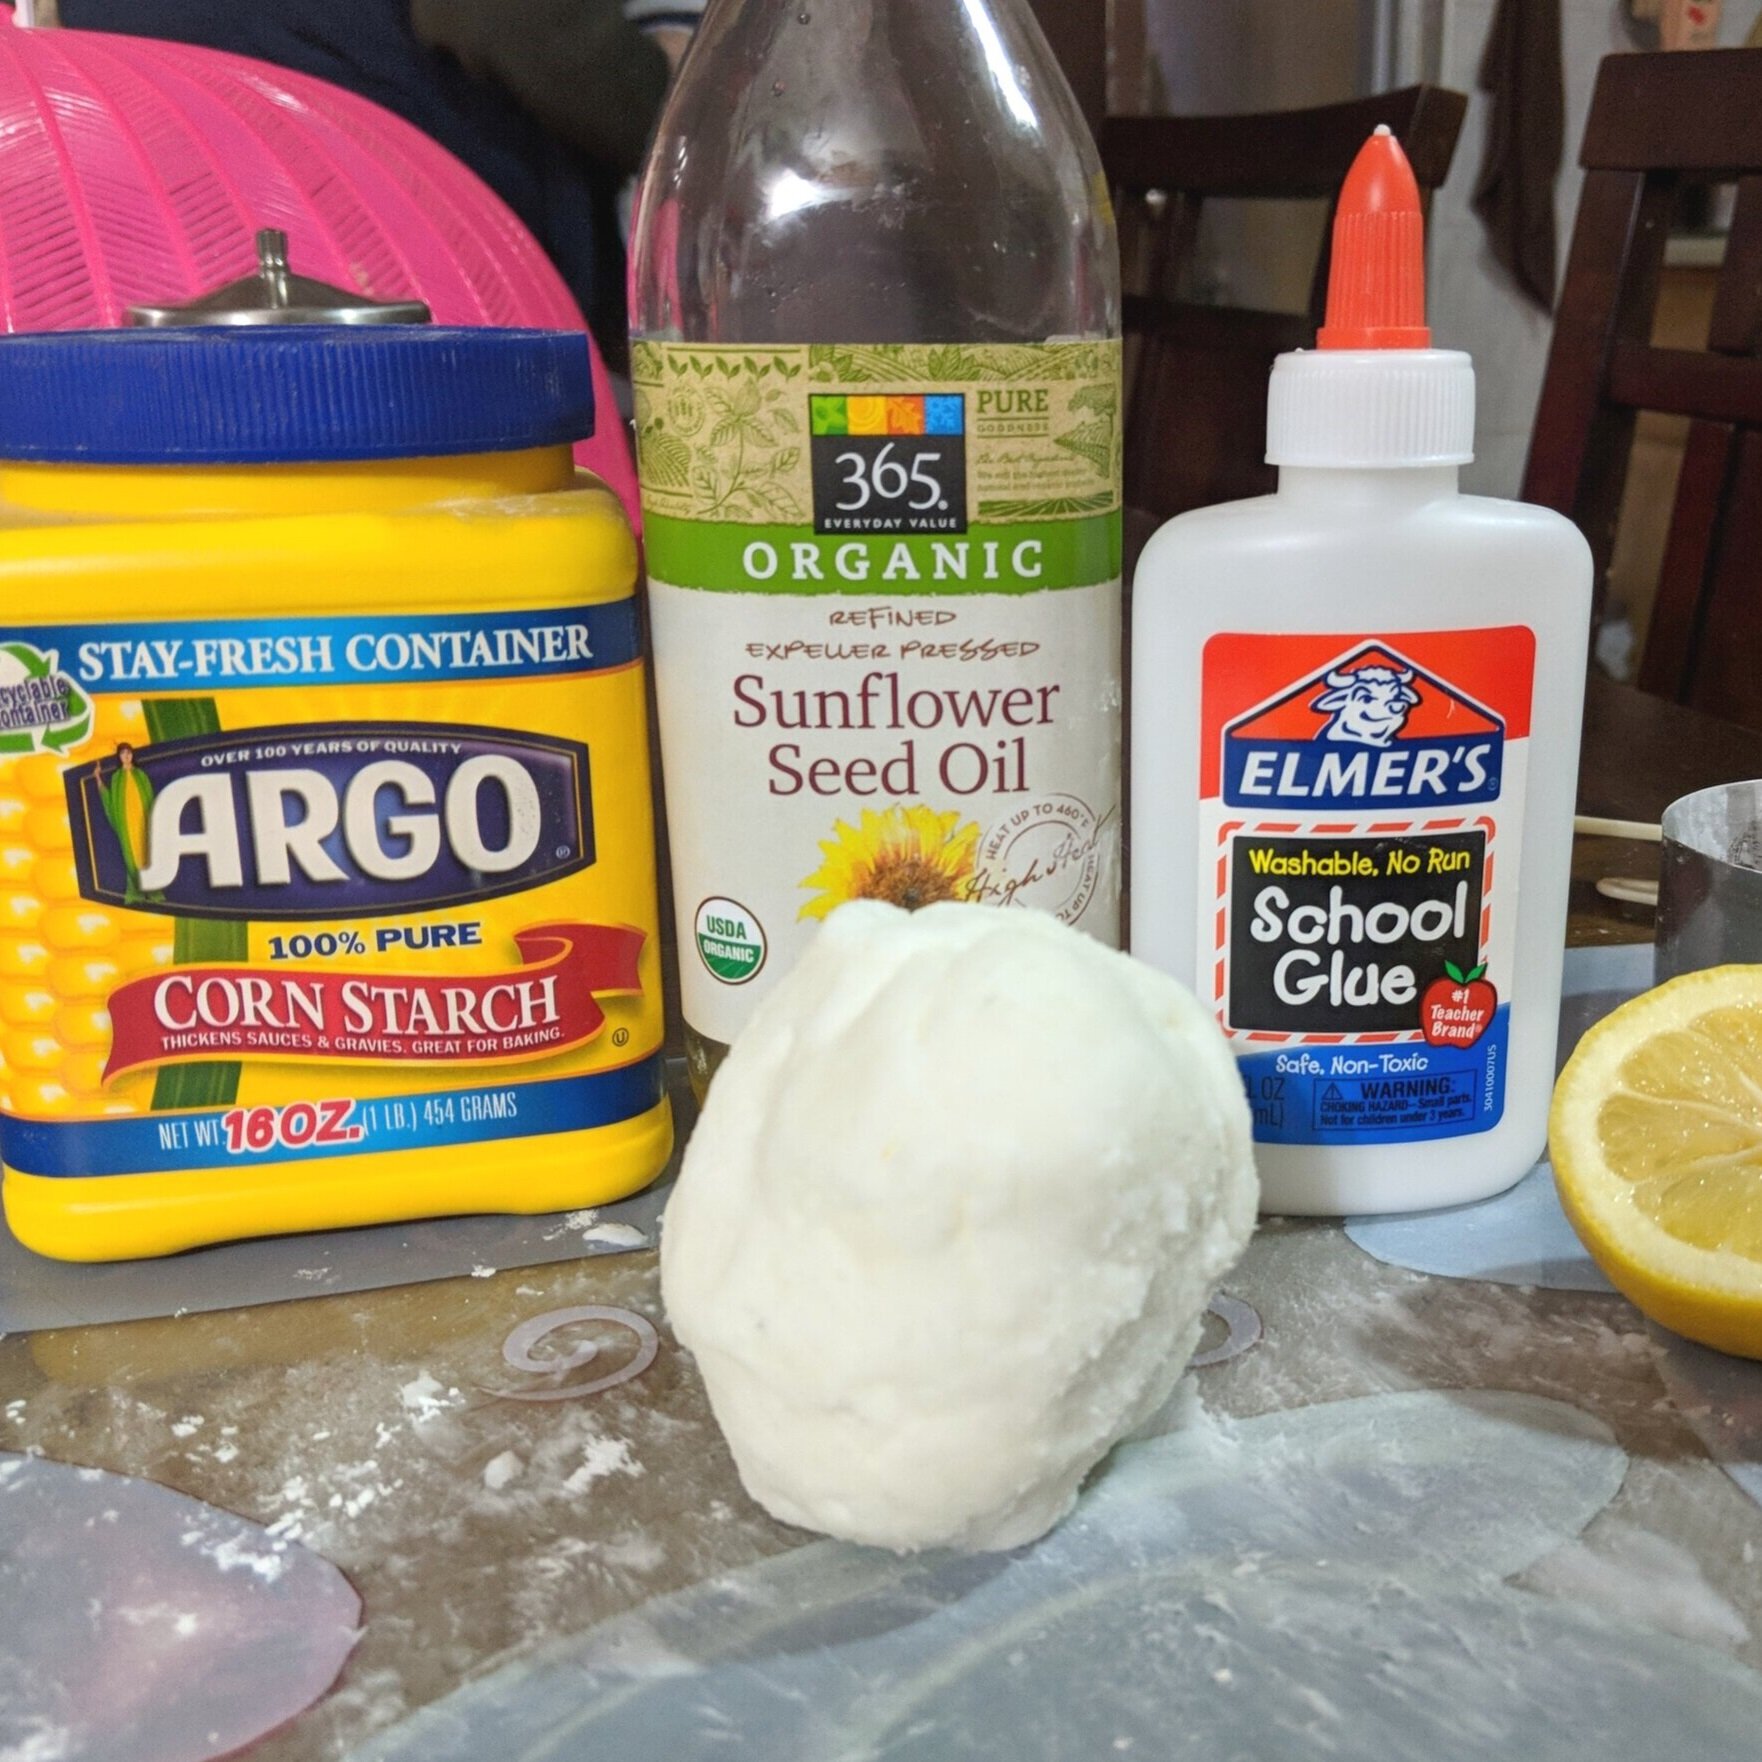
Materials *makes one serving of modeling material
• ½ cup of cornstarch
• 4 oz white glue
• 1 TBS lemon juice (I used half a lemon)
• 2 TBS oil (vegetable, sunflower, baby oil, etc..)
STEPS (estimated time taken: 15 minutes)
1. Add ½ cup of cornstarch, then 4 oz of glue.
2. Mix them together until there’s a smooth icing like consistency.
3. Add 2 Tbs of oil and 1 Tbs of lemon juice then give a quick mix.
4. Pop in microwave for 30 seconds, take out give it a quick mix and place back in for 30 seconds.
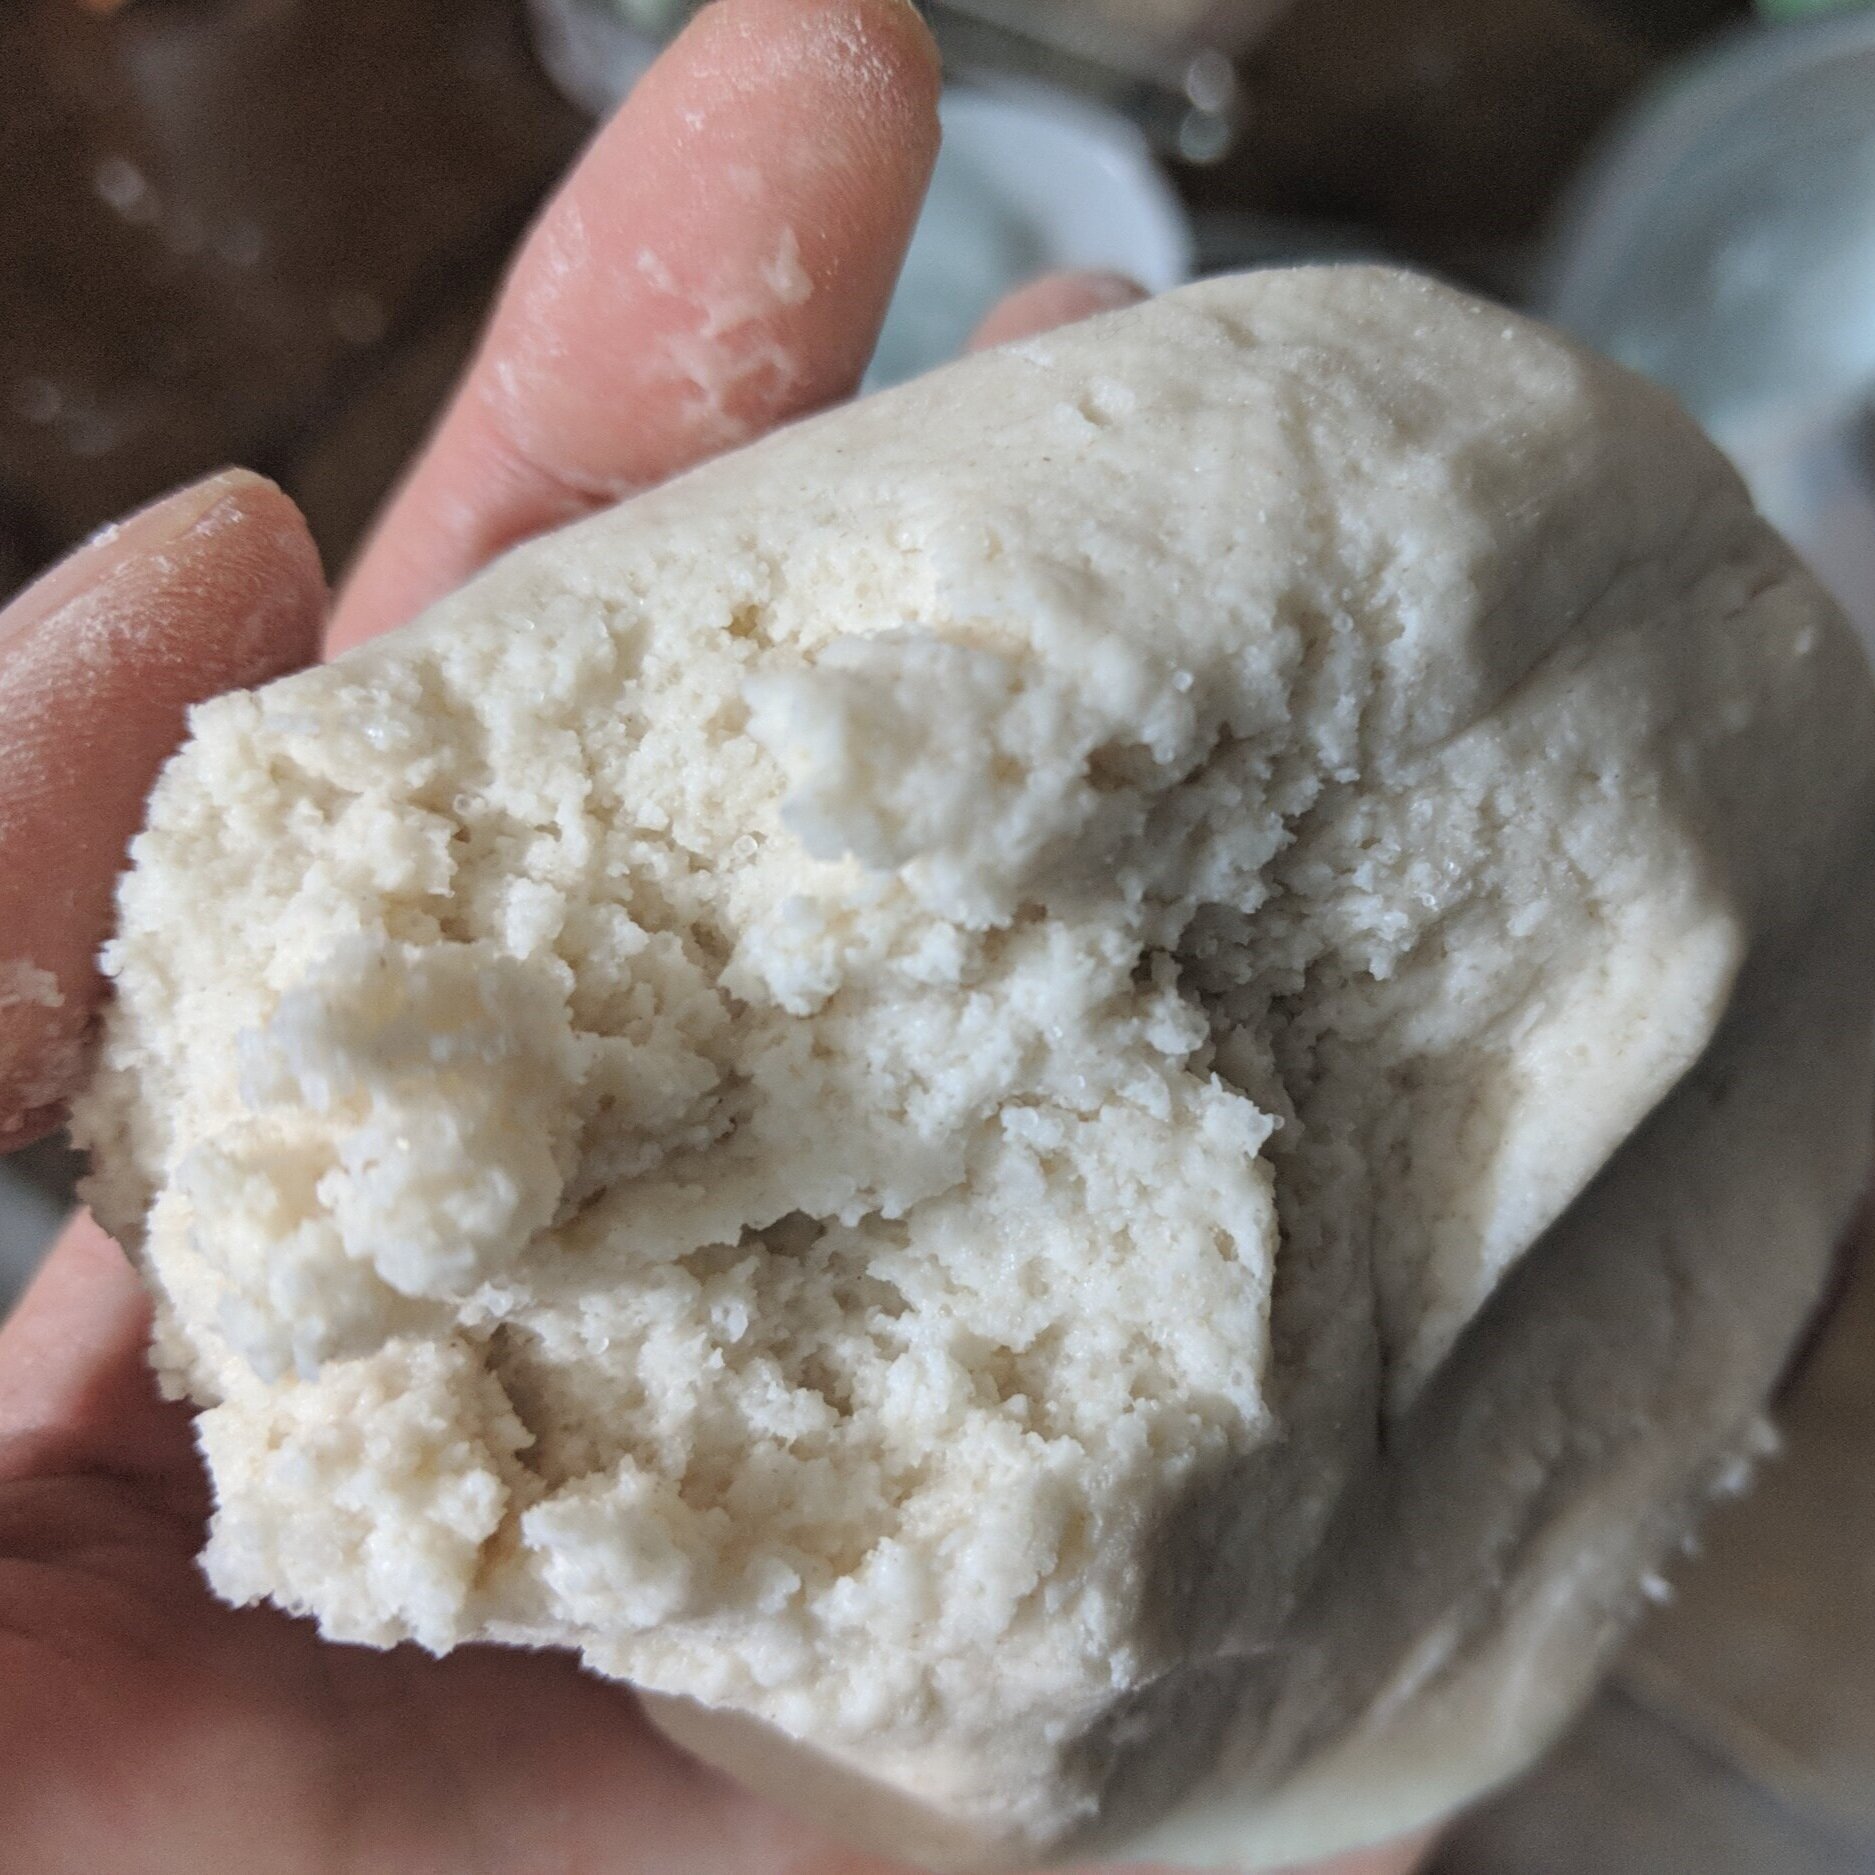
5. After it’s done take a wooden spoon and move around the bowl until it has dough-like consistency.
6. Remove clay and place on parchment paper or clean surface, and gently knead it with cornstarch until it’s no longer sticky. It should have smooth creamy texture.
My reality, with pictures
I used a little less glue than recommended, just under 4oz


2. Mixed together until it is thick like icing
3. For step 3, I used sunflower oil and squeezed half a lemon
4. Make sure to use a microwave-safe bowl (not metal). You may have to reduce microwave time.
5. The material was hot to the touch and while pushing it around, I let it cool. It was pretty firm already, so maybe I added too little glue. This whole process was like making very firm slime.

Fresh out of the microwave and hot
The finished lump
6. Instead of parchment paper, I used a mat with cornstarch sprinkled onto it. If like in my case, it doesn’t have a smooth texture and isn’t as soft-looking as it is in the video, add water and a little oil and knead until it softens up. No need to re-microwave.
7. This recipe makes a perfect one serving for a kid’s craft project for several small things or a medium sized craft. I made a bunny with three-quarters of the cornstarch-glue clay.
Tips and what I learned:
- Better to use more glue
- The material has a soft, bouncy texture
- Cleanup is easy, and like dealing with washing dried school-glue off. A bit of scrubbing needed.
- No weird smells
- Water works to soft it up
- This recipe makes a good single serving of modelling material for a 3-4 inch project
- Maybe it’s because I made it on the drier side, but I found it hard to smooth over
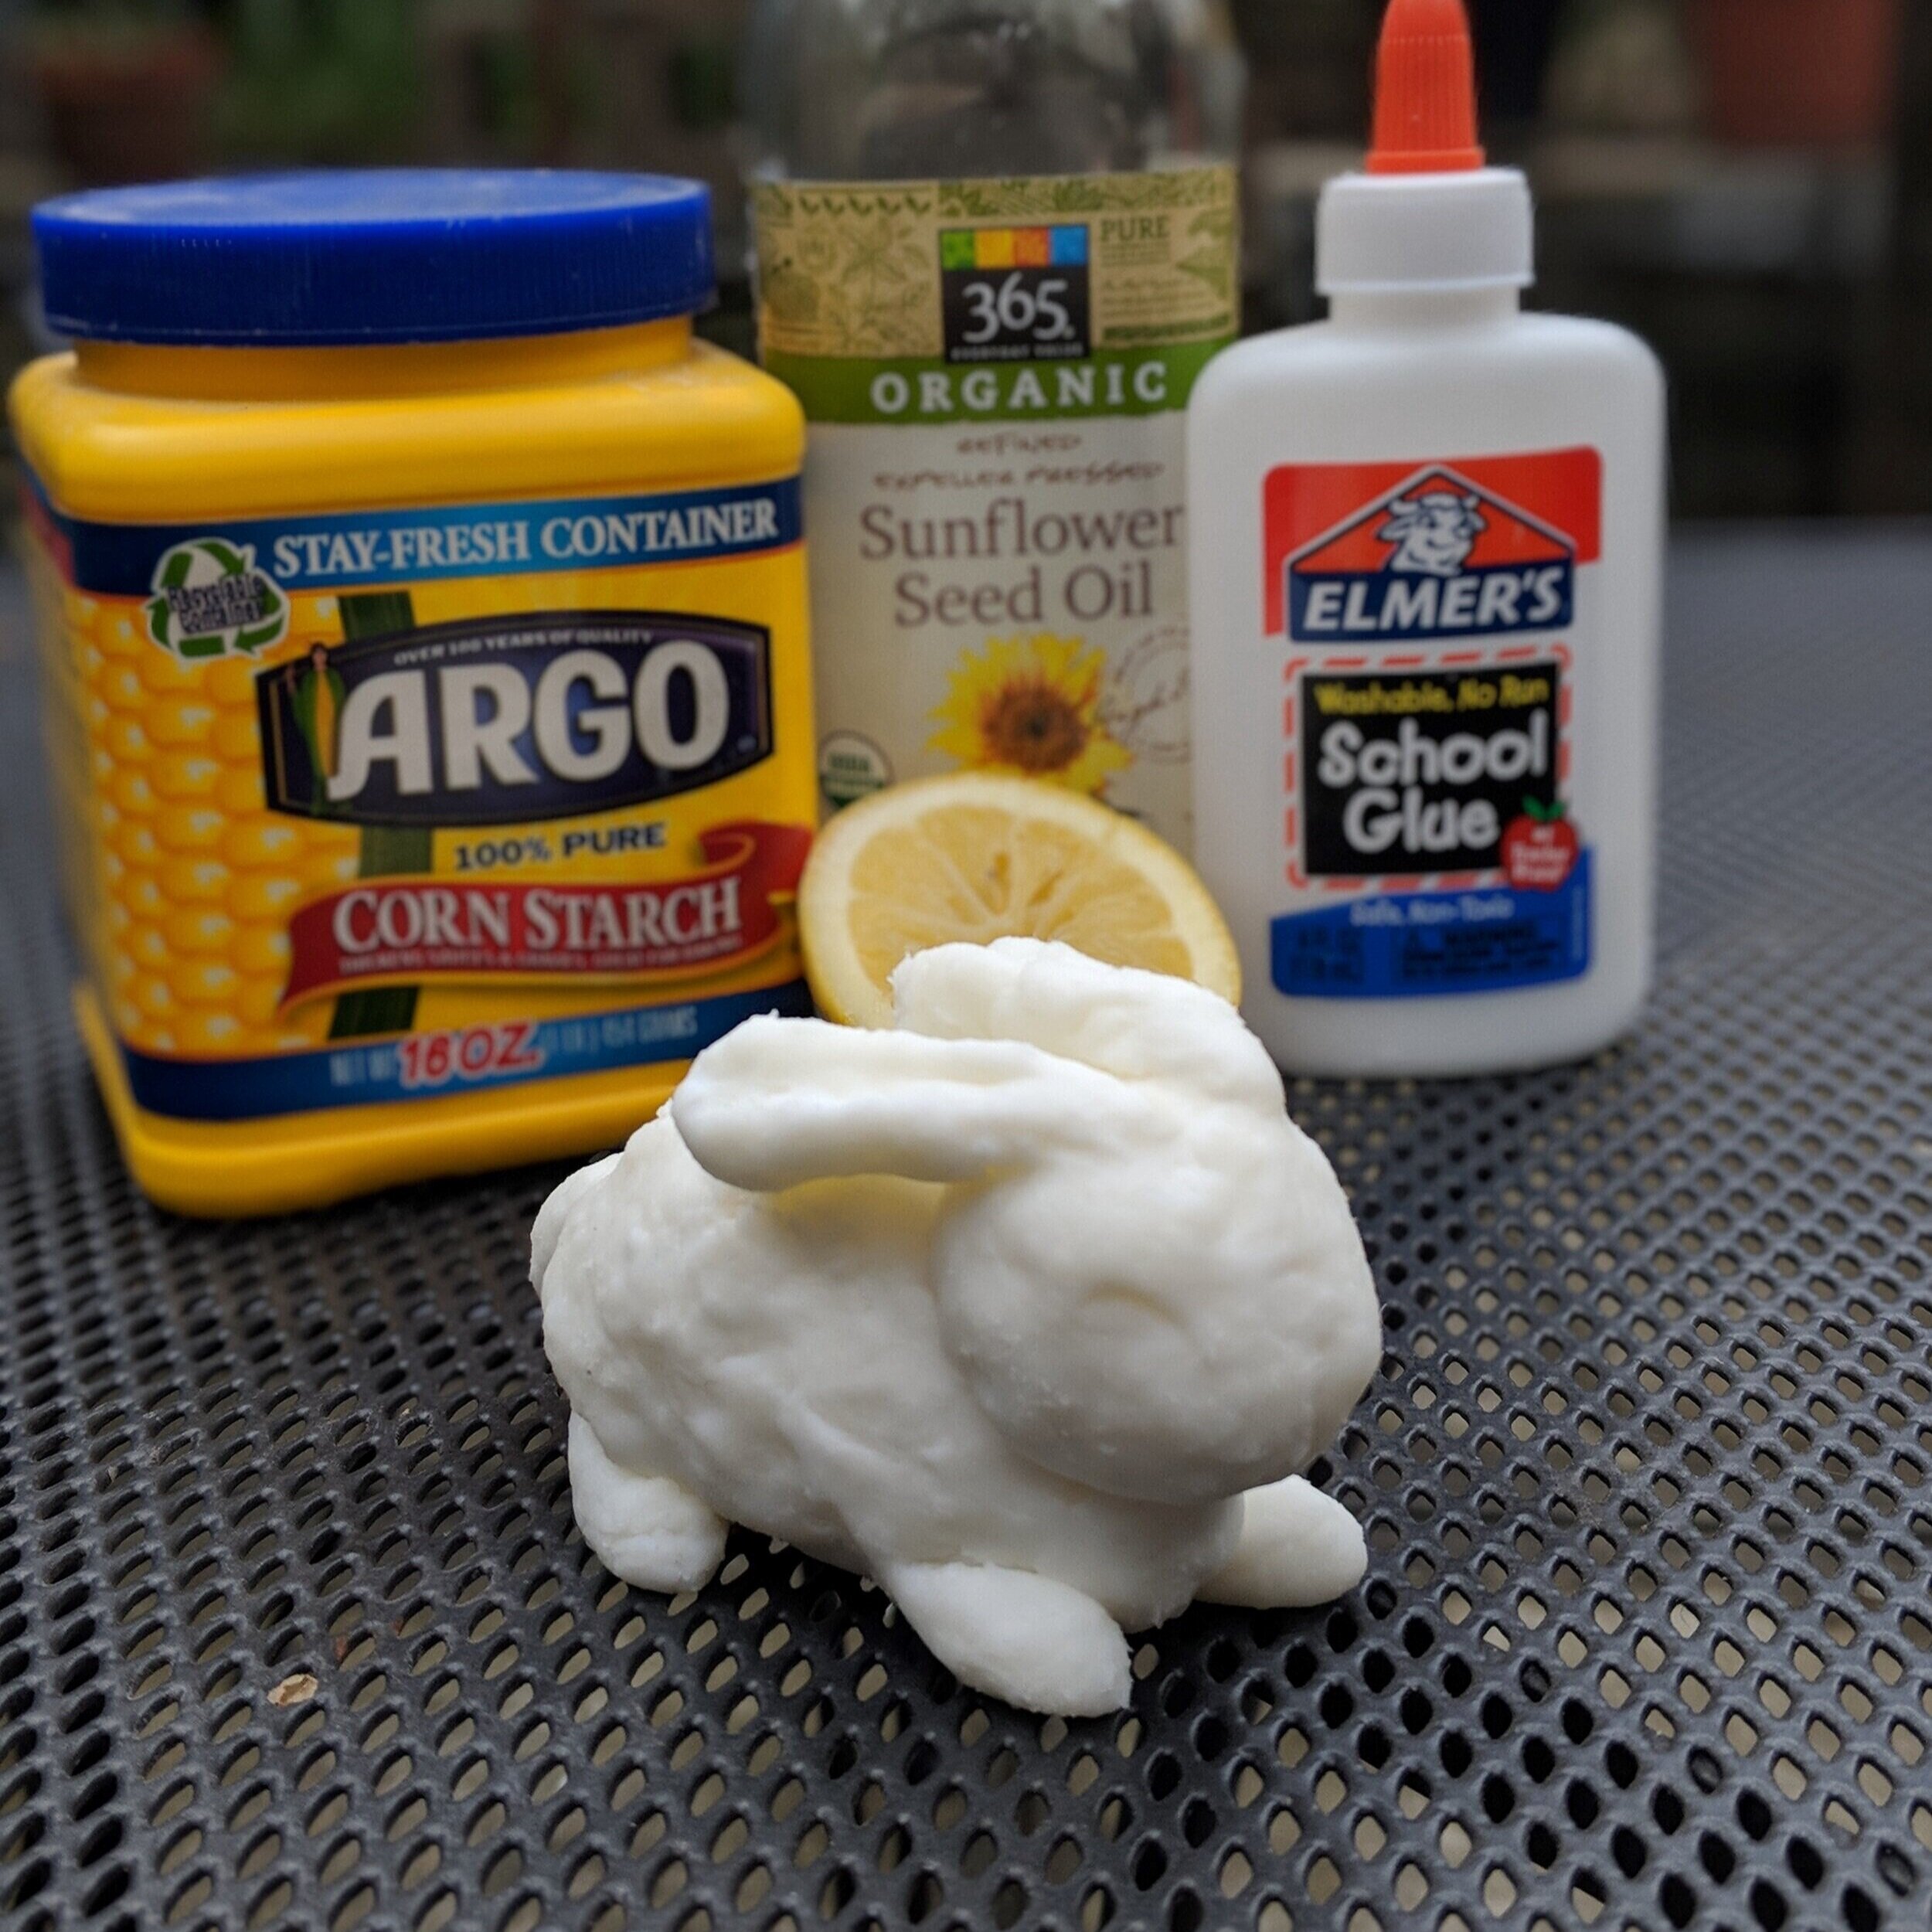
My lumpy bunny from the Cornstarch-Glue recipe
Update - after drying!
After it dried (takes about 48 hours in 60 degree Fahrenheit indoors weather), it cracked in some places which can possibly be because I made the recipe too dry or it was too thick in some places. The parts which have attachments (ears, paws, head, tail) developed cracks along the seams, which means I either should have compress the attachments better or again, it may have stuck together more if it was wetter (more glue). For a project with many parts, I would recommend leaving the parts separate until they dry and then gluing them together.
Review
Overall, it was a fun material to play with, even though I had some difficulties in smoothing it over and attaching things. I would recommend this recipe for projects that need structure and longevity, in comparison to the Flour-salt recipe below. The recipe may be prone to cracking though!
Flour-Salt Recipe
The second recipe is a flour-salt recipe from Wide Rainbow’s YouTube channel, “DIY Workshop & Studio Visit with Jennie Jieun Lee.” Jennie is a ceramicist, for those interested in her practice, enjoy her upstate video tour of her studio.
This is a flour and salt based clay—or dough if you will—using water to bind it, so it is technically edible and child-friendly in all aspects. Gluten-sensitive people should avoid this. Some other recipes from other sites call this “salt clay” and you can bake it or leave it to air dry.
Materials *this recipe is very forgiving and measurements do not need to be precise
4 cups of flour
1 1/2 cup salt (personally, I think that’s a lot of salt)
Water (at least 2 cups)
Or, if you want a single serving, reduce proportionately:
1/2 cup flour
1/6 cup salt
Water (about 1/3 cup)
STEPS (takes about 10 minutes to complete)
Mix salt and flour together well
Mix in enough water slowly to get the dough into the right consistency
My reality
1. I used the single serving recipe:


2. Mixing everything together was very fast and easy with a wood spatula
3. The finished product also made about the same serving size as the cornstarch-glue recipe:

4. The insides and texture of this modeling material are a bit rougher because of the salt, and not as creamy as the cornstarch-glue recipe. The flour-salt recipe is very soft though.
Tips
- Don’t build too thick, as advised in the video by the artist, or the sculpture can crack
- Water works a bit better to attach things together, as compared to the Cornstarch-glue recipe
- SUPER easy to clean up afterwards
- Very safe, non-toxic, and technically edible (very salty)
- This recipe makes a good single serving of modelling material for a 3-4 inch project
- This material is very soft with almost no structure. If you are building something up, it is hard to work with and can sag

Bunnies and plants made from the flour-salt recipe. Happy Spring!
Update - after drying!
After it dried (takes about 36 hours or three days in 60 degree Fahrenheit indoors), it did not crack, and was still moist, which can possibly be because it was too thick in some places. The parts which have attachments (ears, paws, head, tail) looked fine, but it has sagged a little in the hollow body. The dried surfaces are a bit rough, but online recipes say you can sand the surface down carefully for a smoother feel.
Review
Overall, I would recommend this recipe if you want to do something very, very easy from start to finish. This recipe is more forgiving than the Cornstarch-glue recipe, but has less structural integrity. It is perfect for those who want a natural recipe and want to bake it in the end. Depending on the size, recipes recommend baking this recipe at 250 degrees Fahrenheit for 20-30 minutes. Take out before it browns. I would also bake this along with a slow-bake cake so you can catch two birds with one worm!
I hope you get to try one of the recipes during your time indoors. Thank you for reading and please take a look at our Virtual Clay Youth classes in the meantime. We also have many free Virtual Clay Lectures. Rest assured if you don’t have air-dry clay—you now know how to make some at home!
Stay healthy and start clayying!
Review and words by Jessica Zeng